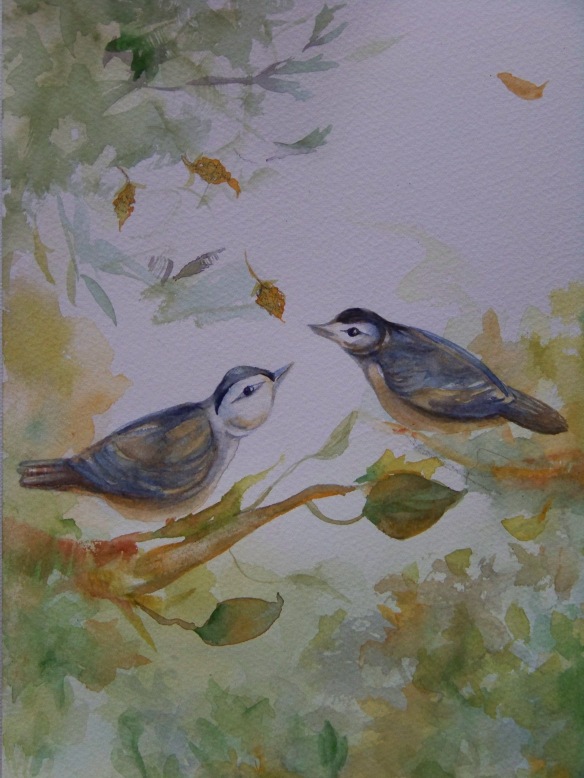
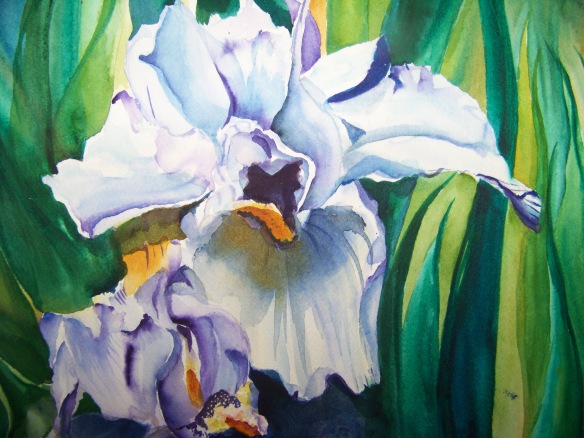
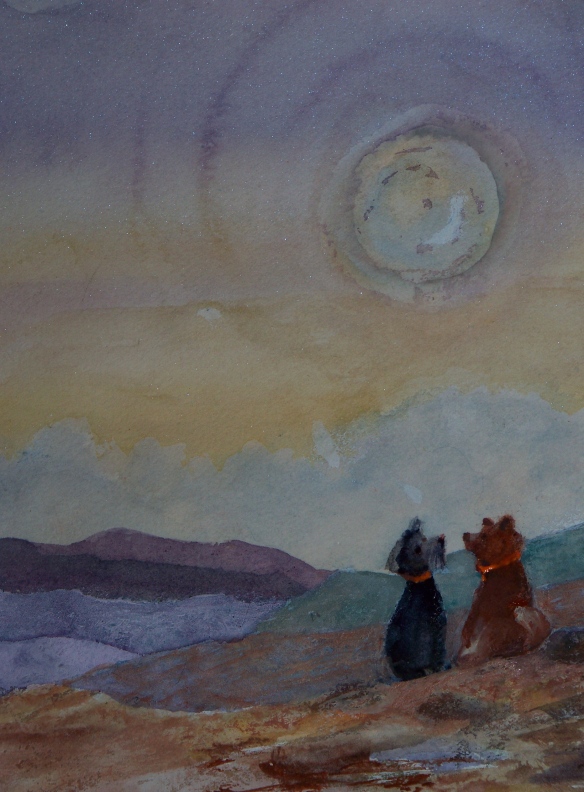
“Iris Spring” 8 X 11 inches Watercolor $50.00
“The falls” $ 30.00 4″ by 12″ Watercolor on paper by Shanti Marie
Image
Photo of one of my koi “white boy” NFS
“My koi Baby” 8 by 10 watercolor $25.00
Watercolor Butterflies, step by step, now finished $125.00 -12″ by 17.5″
This photo (above) is the finished painting. After removing the masking from the butterfly shapes, I painted each butterfly directly in various painting styles. Several were painted wet into wet. Wet into wet is a term that means your brush is wet with color or water and so is your paper. Other butterfly shapes were painted in a series of glazes. The glazing method is where I paint a butterfly with color while the paper is dry, after each layer of paint is dry, another layer of color is painted over the fist. This painting can be painted to a higher level of realism but I prefer to leave it in this ” Loose ” slightly less defined stage. It gives the viewer’s eyes something to decipher. 

The first thing you may need to do is plan a little. Usually most Artists would draw out their painting onto the watercolor painting. I don’t like to do line drawings but rather a simple road map drawing or mass drawing. Instead of drawing every detail, I place the larger shapes where I think will be best. I try to visualize some of the important compositional details. Such as, the dark and light areas, the directional flow of the painting and the focal point. This gives me an outline but allows some spontaneous happenings. It may seem scary to allow the painting to dictate many of the finer details, but we all know these things give your paintings a life of their own. Above you can see a page of my sketch book with several value studies (ink pen) which gives me the opportunity to explore several ideas. Often I don’t use any of them but each drawing helps me sort out (in my mind) what I want. Also, I usually include some notes about what works and apparently what I feel does not work. This can really jump-start the painting process. This is also a good way to record some of your ideas, often you may find you don’t want to paint “THIS” painting yet but later when you’re looking thru your sketchbook, you read over your notes and see your small sketches and you get a new inspiration and years later will find the time is right for “this” painting.
I have decided for our painting to use a simple butterfly shape which I will repeat at various depths of the wet into wet painting.
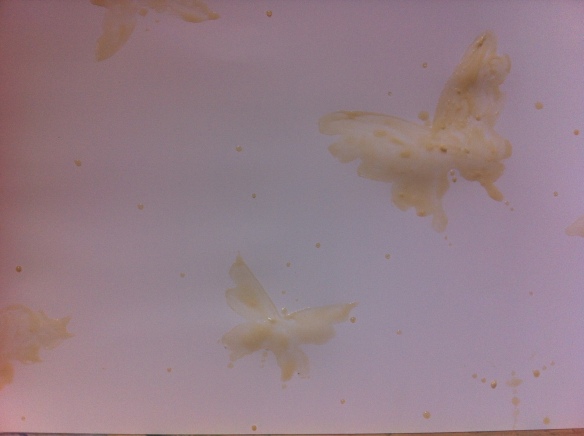
In this photo you can see I have used some mastic or masking fluid. I’m not a big fan of Masking fluid as it produces very hard edges and I like a mix of soft and hard edges. I chose to use the masking fluid to demonstrate it for you on hot press paper. Rule number one with masking fluid: “make sure your paper is bone dry.” Also Remember…Don’t shake your masking fluid, stir it, you do not want bubbles in the masking fluid. Tiny bubbles will leave holes in your masked area allowing paint to be deposited in your protected area. Most people use watercolor brushes to apply the fluid, I don’t recommend using a good brush to lay down mastic. This stuff is basically latex paint. Its rubbery and a mess when it dries. I use pipette or small oil painting brushes which I can throw away or clean with solvents. For larger areas, I pour it on and smooth it out with a palette knife or plastic spoon.
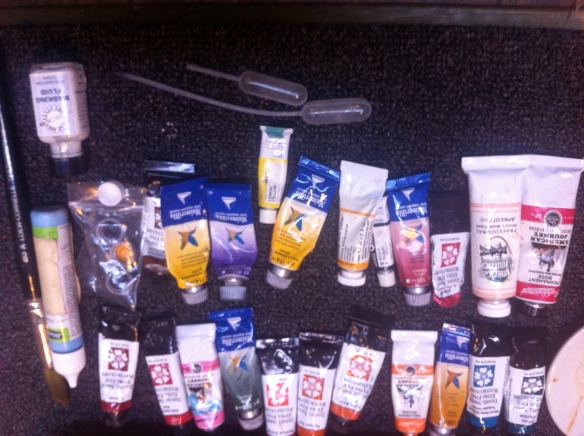
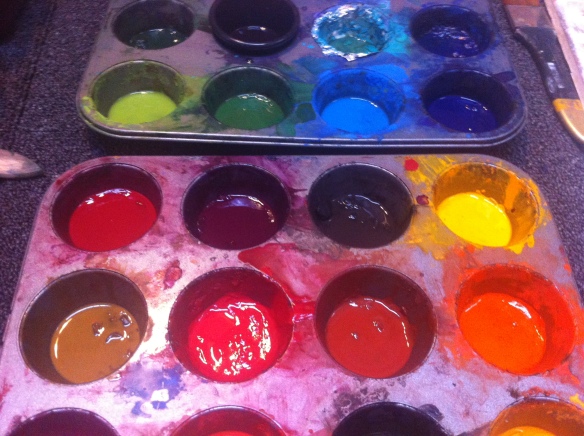
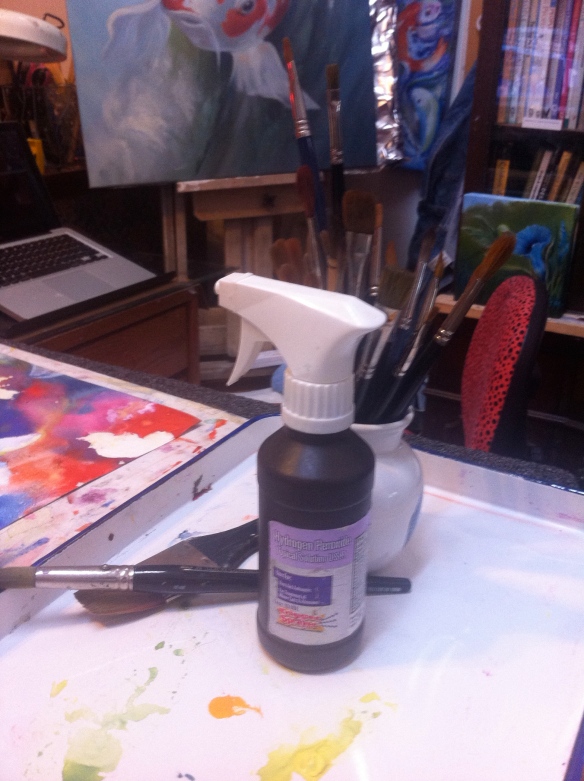

These photos show you some of my supplies laid out in preparation for painting. With any Watercolor painting you must have everything you will need at your fingertips. The process is less forgiving but when you make changes you can do so if you have everything ready. It’s just a matter of timing.
Supplies: Paints, container for clean water, cloths or paper towels, watercolor paper, a piece of glass or plastic like plexiglass to place under your paper for this very wet style of painting. I’m using Gator board (you can buy this product thru art stores like “Cheap Joes”), a spray bottle filled with water, butcher trays, palette trays,or plates to mix paint, and paint brushes, and if you want, (I didn’t use any of these in this painting.) you can also plan to have some of these other items, Saran wrap, salt, alcohol, inks, watercolor crayons or wax crayons.

The first stage is simple, you paint the mastic or masking fluid onto the paper where you want to save the white of the paper. I painted the butterfly shapes and also place dots in different places on the hot press paper. (Fabriano Atistico Hot Press 140 LB). You now step away from the painting and go do something else for about 20 minutes to allow the fluid to dry.
Next, I took the paper to the sink and wet the front and the back of the paper with clean clear water. I placed the paper onto the gator board and smoothed it out (do not make any marks, dents or creases with your hands) lay it down so it is totally flat. Use paper towels or cloths to absorb any puddles. Next drop your paint onto the wet paper or uses paint brushes to apply the paint where you want color. Now you will lift the paper either by the corners of the paper or by the gator board and allow the paint to mix together, always watching for magic. In this stage I use some staining colors but if you are unsure, use no staining colors and you can still spray back areas and reapply paint, or for any area you do not like, you can lift the color back by absorbing paint from the paper with towels. Do not rub the paper at this delicate state. Gently blot.
You can use the spray bottle either with paint or water to spray on color or just water for dilution of color or as a directional element.

Here is a close up of the paper with water and areas of applied masking fluid.
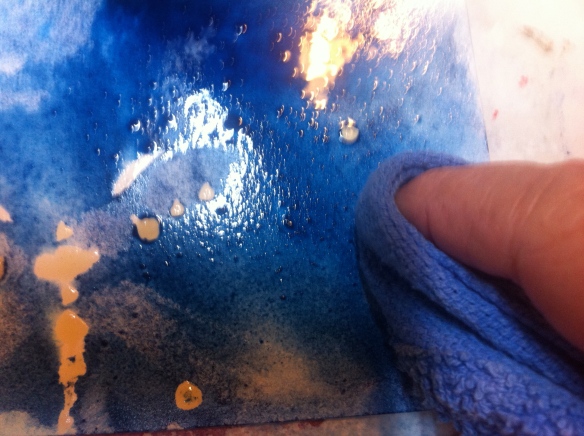
Close up of wet paint and water on the paper. Here I’m using a towel to pull some of the water and paint from an area of the painting. Below you can see while the painting is still very wet, I allowed the paint to run and mix and alternating putting paint on and pulling paint off of the paper. Applying water and blotting. A very give and take method of painting.

After I have decided I have everything I want from the Second stage of the painting, I will allow the painting to dry. If I want to pull any paint away from an area I will do it now before it is completely dry. If the paint runs back into the area, it is still too wet. Allow to dry for a bit longer and use a soft brush to pick up the wet paint. Perhaps defining some areas.
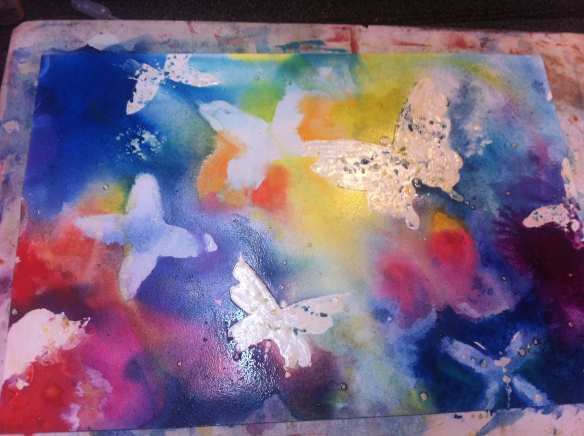
This photo is after I have painted each area a little darker while the paper is still wet. Now I’ll let it dry, Watercolor paintings will be slightly lighter when dry.
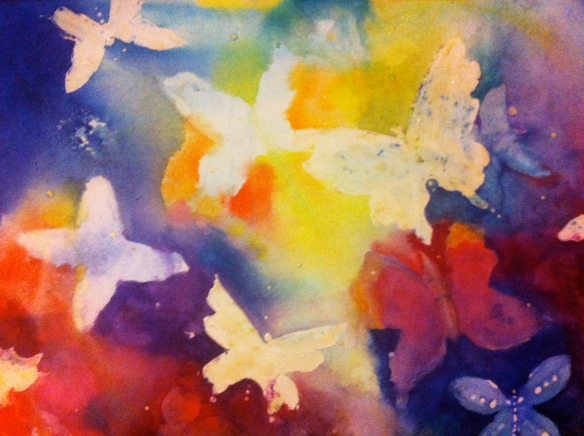
Now the painting is dry and I will look at it upside down and even sideways to see how the composition is working.
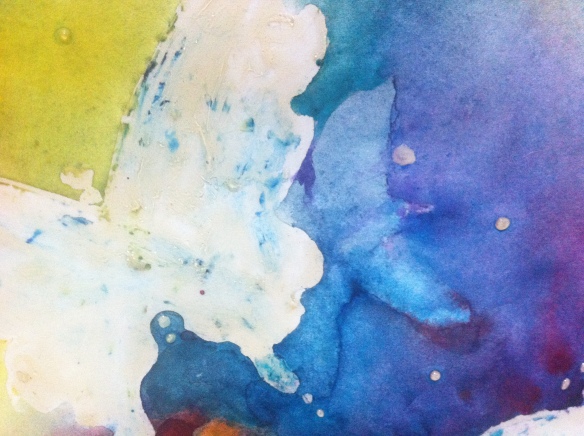
Above you can see an example of negative painting. The larger butterfly is covered with masking fluid while the smaller one is created by painting the area darker around a lighter area creating a butterfly. I don’t try to make perfect shapes the impression of a butterfly will work best. I want the overlap effect to help push one of the butterflies behind the other.
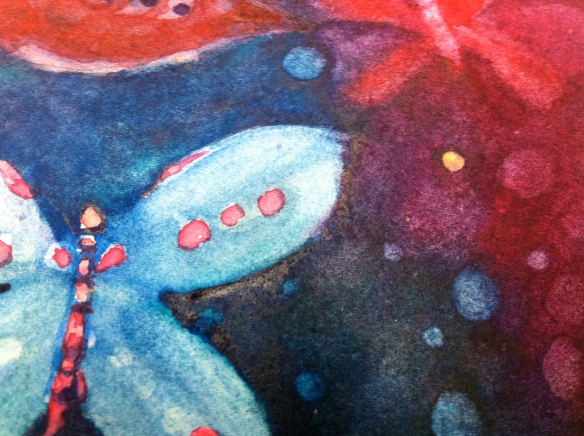
Now is also a good time to pull out some shapes from the darker areas, creating light. I have decided some round spears would be a good shape to include, this is a fantasy painting after all.
You can wet a spot in the darker paint and lift out with a cotton ball, Mr clean magic sponge, a q-tip, or a paint brush. In these darker areas it will bring a mid tone which will create a more complex piece and add another element. If you only want tiny dots, a spray bottle can be used. You may have to cover up areas you want to protect. Spray a fine mist, allow it to sit for a while and blot off. If the dark areas are dark enough this will work. It works on lighter areas but obviously it will be less noticeable. If you want, you can also spray watercolor paint from a spray bottle. I make up small bottles of various colors (the kind you can buy for travel)and pull them out to use them over and over. Reconstituting the pigments with water when they dry out.
Below you will notice I’ve painted the painting as dark as I would like it. I did this by Glazing… after the painting is dry I paint another layer of color over the first layer. This can be the same color if you want to darken or intensify the area or it can be another color, which will work like stained glass. You’ll be looking thru the two transparent colors. For example, if you have yellow and you paint blue over it, it will appear green. Try different combinations and see what appeals to you. I still have the mastic in place and the next step will be to remove it. Before removing the mastic the painting must be dry. You can use your finger tips to rub off the layer of Latex (Masking fluid is a latex medium) covering the paper, or you can purchase a tool that looks like a rubber eraser which pulls it off.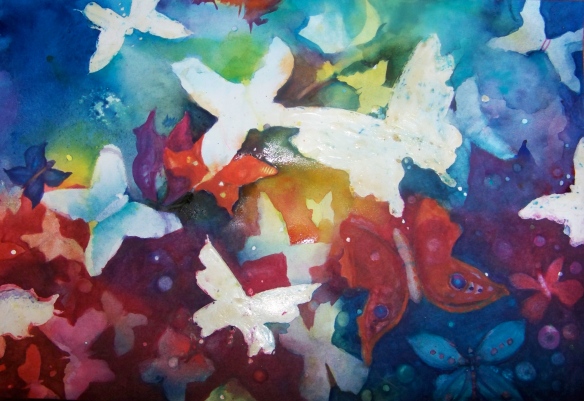
Below I have pulled off the masking fluid from the butterfly on the far right edge of the paper. I have opted to leave the masking on the other butterflies until I’m ready to paint them. By leaving the masking on till later I have more options, knowing my butterflies are protected.  To demonstrate another technique, I have decided to use a waterproof black pen to draw small lines on the butterfly shape. I’m using a Micron #05 black fine tipped marker. You can opt to use any pen that is waterproof. Another brand I recommend is Faber-Castell (Pitt Pen).
In the next step, I used clear water to paint one wing at a time dropping the paint on the wet paper allowing it to flow. Since I painted the background dark and I want this butterfly to come forward. I painted this butterfly very light and not wanting to bring too much attention to the edge, I didn’t use too bright of color combinations.
I continue to pull off the masking fluid from one butterfly at a time.

Each butterfly is painted in various ways. please see the finished photo of the painting which should now be at the top of this post. If you have any questions, contact me at shantmarie@aol.com
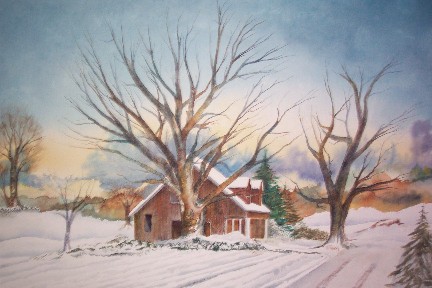
How to start an Art group – “Snowy Farm” 15″ by 22″ watercolor by Shanti Marie
Aside
If you are out there in your studio working on your art and feel a little alone, believe me you’re not alone. Artists everywhere like to work without distractions but even though we like to work alone. We often need a little support. It’s difficult to get an honest opinion from family and friends. They aren’t professional Artists and their opinions although nice are not always helpful. Every Artist can improve their work by joining an existing art group or creating an art group specially to fit their needs.
There are many benefits when you start your own group, you can attract other artists with similar interests and needs. It’s actually pretty easy to attract other artists, you can use on-line forums, or social networks like Facebook. Of course you can go old school with flyers at local colleges, neighborhood coffee shops, well just about anywhere Artists may congregate.
You should consider setting up some preliminary guidelines for your group. They might be helpful to make sure you create a group that will meet your needs. We’ve all joined groups only to find the group’s focus is not aligned with your own. You’ll want individuals who are interested in pursuing the same goals. Decide what these goals will be and place this information in your ad. Some other things to consider; How large of a membership? Often a small group of like-minded artists working in the same medium will work better than a large group with varied interests. Will you have membership fees? If so how will the fees be utilized? What type of Artists will make up the group? …Professional, amateur, or Sunday painters. What activities will the group sponsor? Will you have non-profit status & officers? Or just meet in each others home informally. After deciding these few things and a few more, the rest will be easy. You should be able to find other Artists who will support you and your work should improve.
Art, how to make it your own. The quest to be unique! “Three Amigos” 4 by 6 watercolor $30.00
So many days I struggle as an artist to truly create something that is fresh, new and unique. I’m not alone in this daily struggle. It’s a common topic of conversation in Artist circles. Of course, like most people, I’m influenced by everything I see and hear. And, like so many people, these images, colors, or symbols will appear in my work. This is not because I lack an imagination but because I share a connection or a sense of belonging with these images. It is a way to describe a little bit of myself. Some folks call it collective consciousness others think that this is “voo doo” – “new age” crap. Call it whatever you wish, Artists often need to paint in a series or paint similar subject matter to find their unique voice.
We’re living in a time of information and unlimited access to visual stimulus. All you have to remember when you sit down to paint is: nothing is “new”. All subjects have been painted. You need to just make it your own. While even Matisse and Picasso challenged each other for years by painting similar subject matter; some say this helped each artist develop their inner vision. Others might call it their own method, technique or style. This technique can be useful to the solo painter as well.
Give it a try, the next time you’re struggling with what to paint, try painting a common object and do it in a way that describes your interpretation. You are unique! Allow this uniqueness to surface and make your Art memorable.
All dogs go to heaven #51 6 by 8 watercolor $40.00
“Perfect Pink” 6 by 8 watercolor
Carolina Wrenn 8 by 10 watercolor on paper $90.00
“Yellow Lab” watercolor 16″ by 20 ” Shanti Marie $100.00
moonllight 11 by 15.5 Watercolor on paper $200.00
“Little Redhead” Watercolor on paper 11 by 15 matted to 16 by 20 $ 50.00
This little redhead was a model for us at Spring Maid (Mrytle Beach).
I have cropped about 3 inches from the bottom and if you purchase this painting, her breasts are also in the shot. Obviously they can be physically cropped if this isn’t desirable.
Stunning color with a good balance of both cool and warm colors.

